
Moulding & casting the front wheel holder of the BJD wheelchair.
Step by step process description under the cut. #resincasting #PUresin #mouldmaking #moldmaking #siliconemould #prototyping #BJDwheelchair #PuppitProductions #tutorial
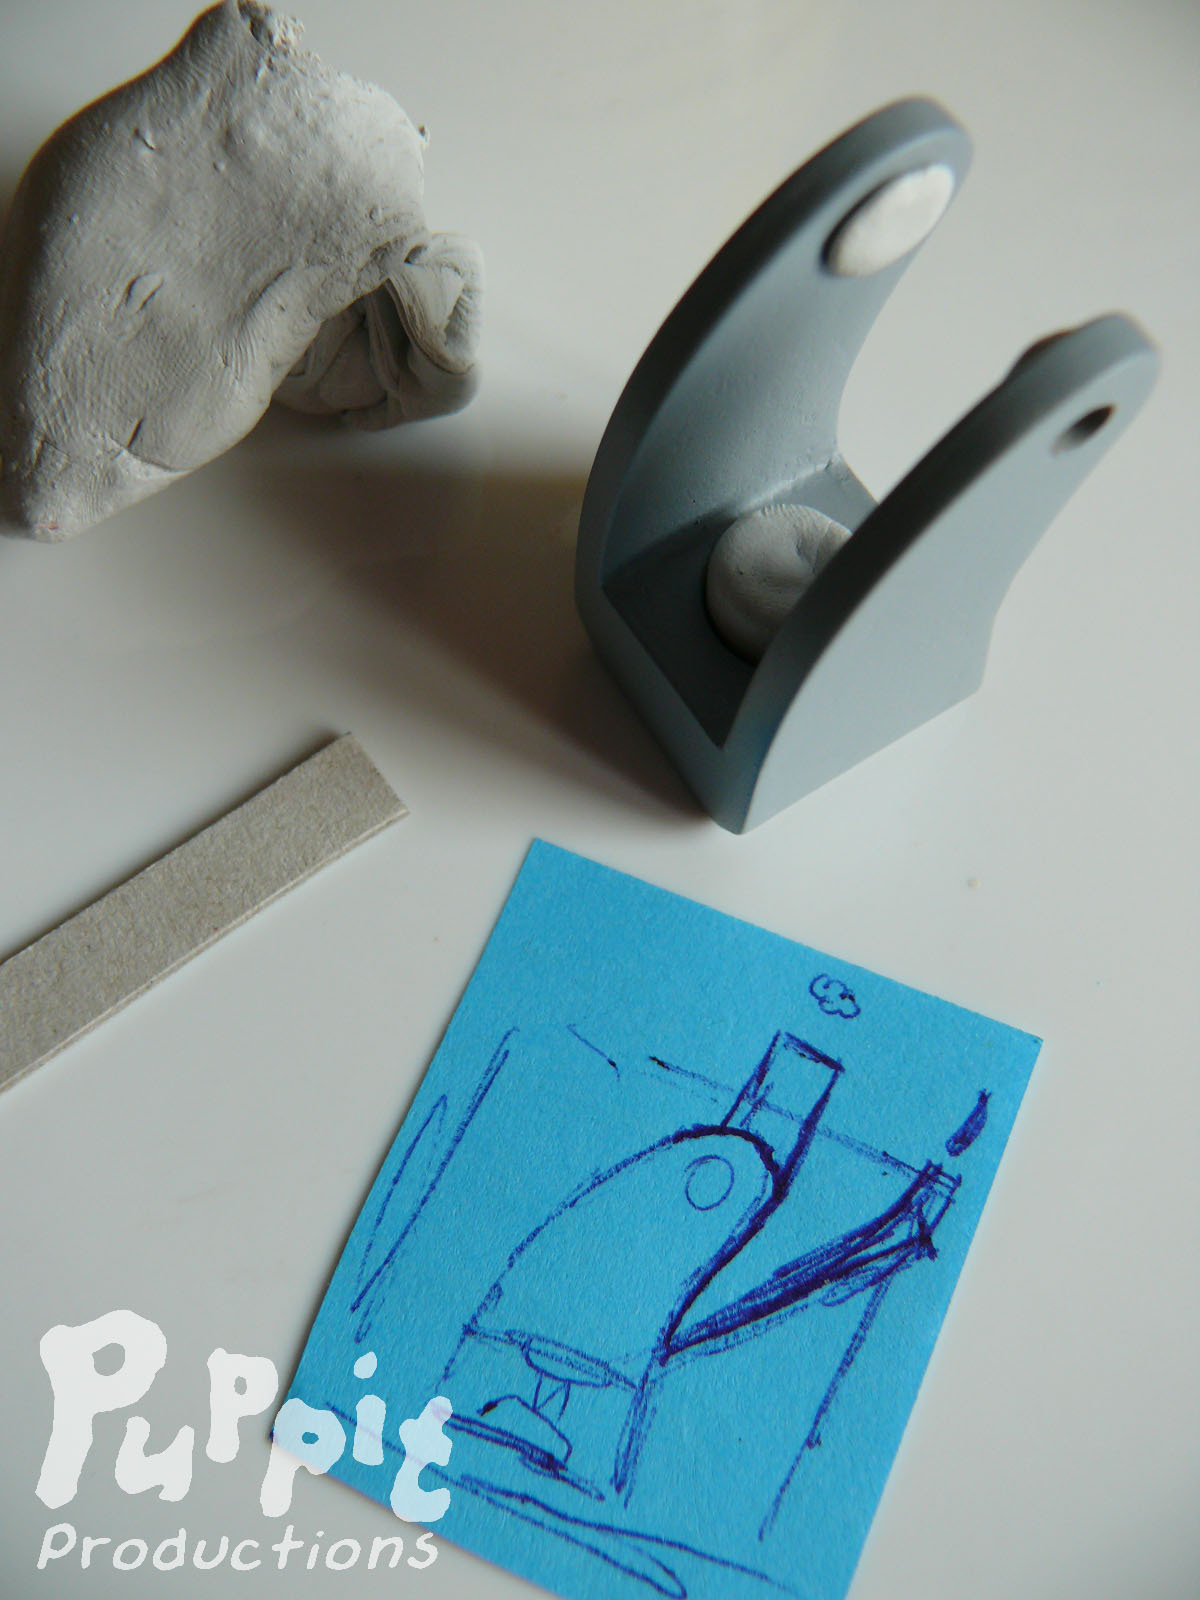
Step one: Planning. Figuring out how the shape should sit in the mould to minimize trapped air and casting/air channels in annoying places. Determine if it needs to be a two-part mould or if it can remain just one.
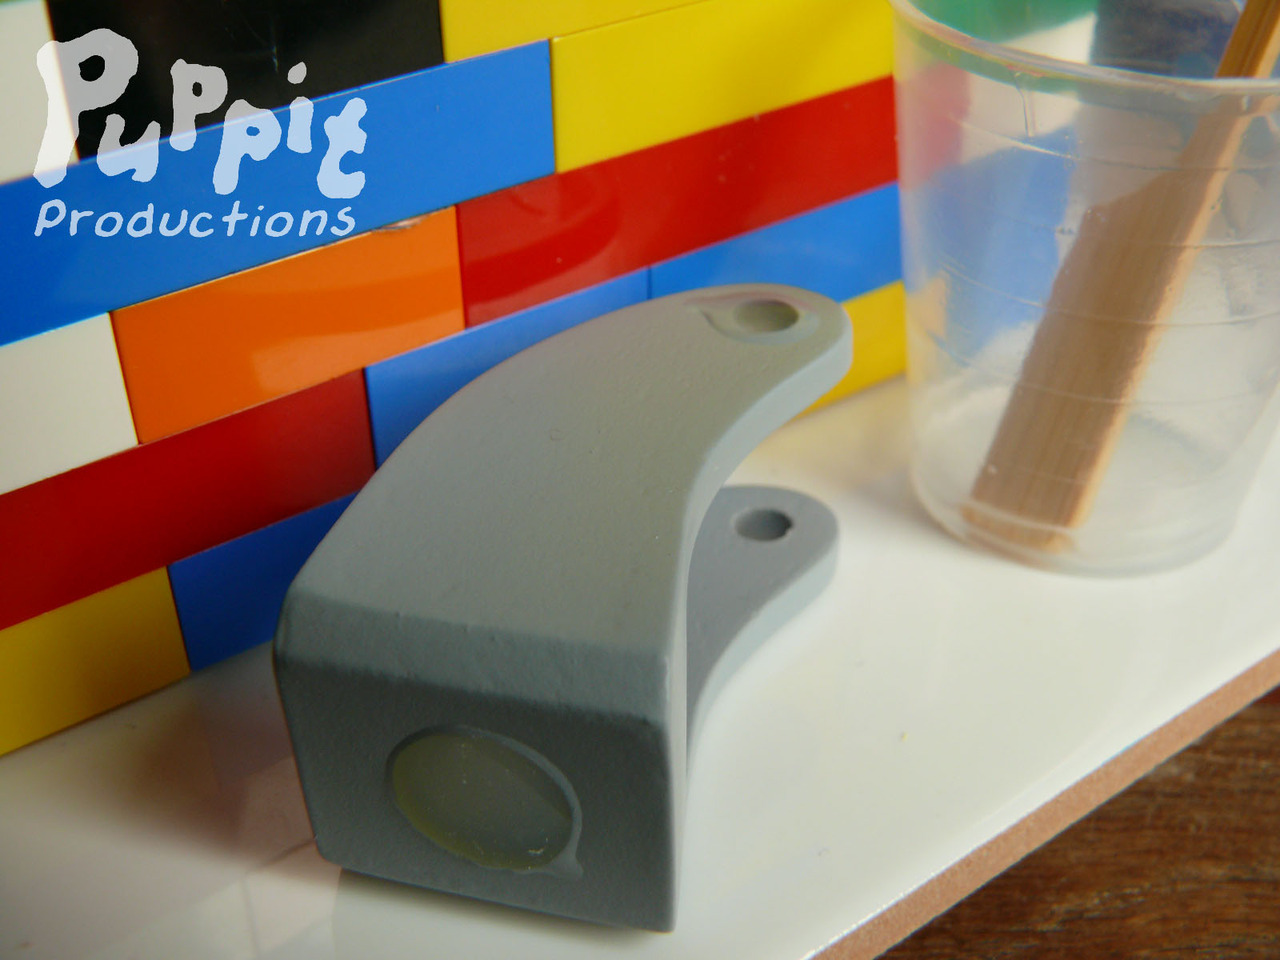
Step two: Preparing. I decided on a one-piece mould, but if I were to just toss silicone all over the thing, the hollow tunnels would become a problem. So I put some eye putty/ poster buddy/ kneadable eraser or whatever you call it on side of each hole, pour in a tiny bit of silicone rubber and let it cure one by one. Then removed the putty, and coated that side with some release agent in order to have only one side stick to the rest of the mould.
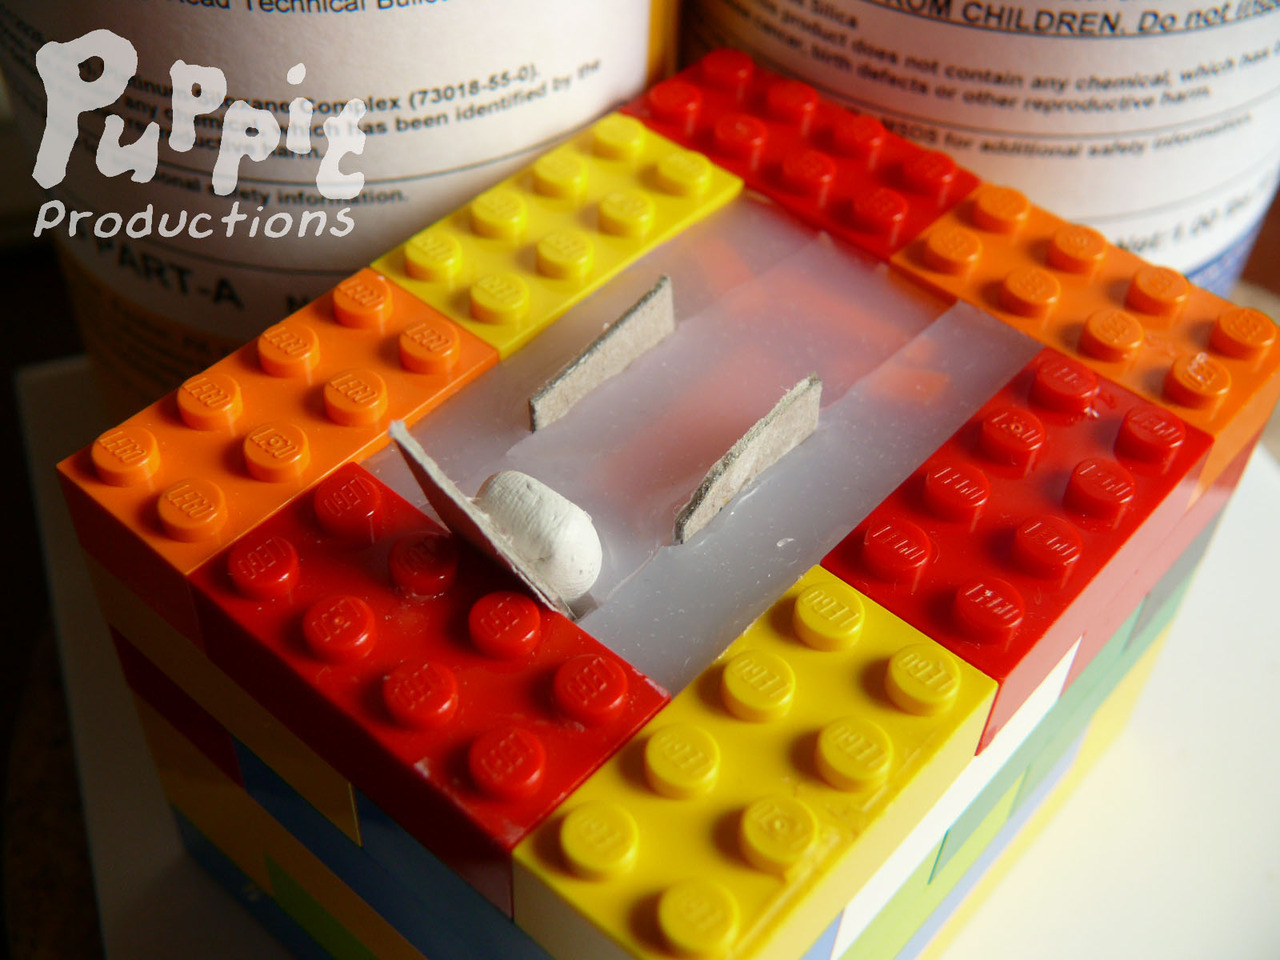
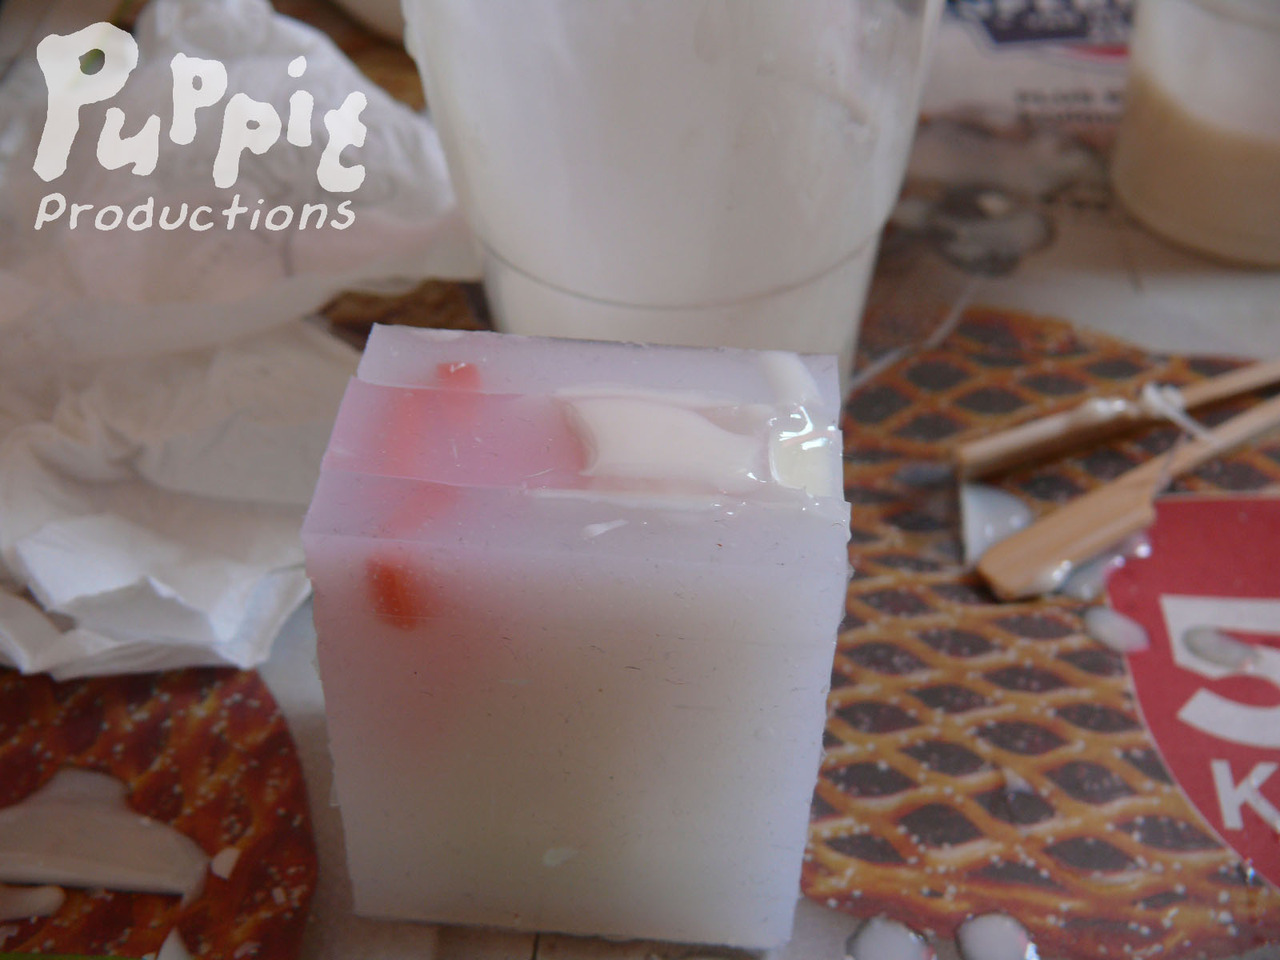
Step three: Embedded in leakage-free enclosure (lego walls with some putty on the bottom, pressed onto a ceramic tile) and poured silicone. Let it cure (I actually already moved on to step four and took it out before I remembered I should take a picture, so I put it back…hence the carving lines).
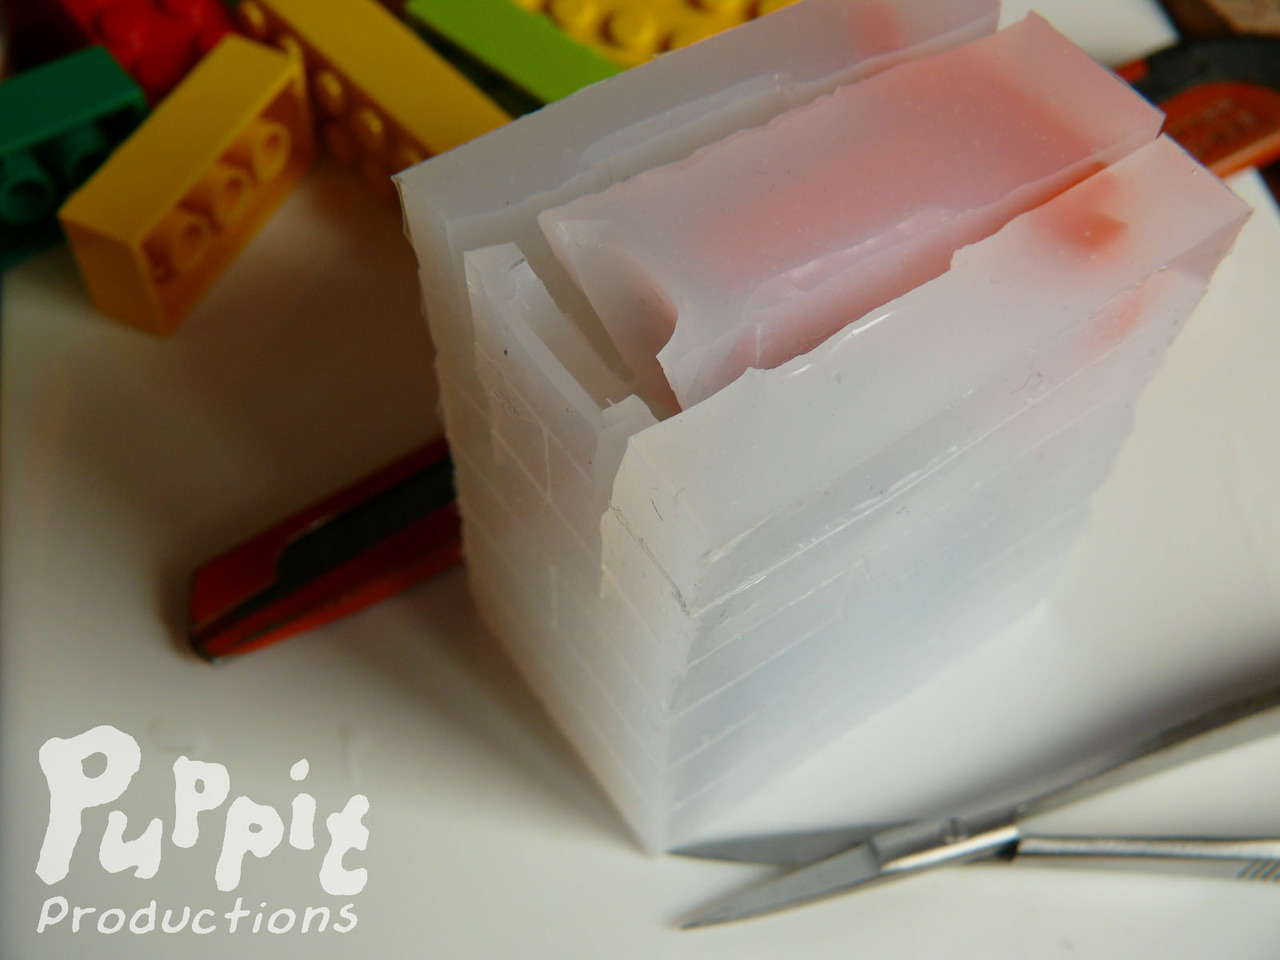
Step four: De-moulding, carefully cutting out the original. The mould is now finished.
Step five: Casting. Having carefully poured in the resin, rotating the mould a bit to make sure everything is coated and air got the chance to get out, set to cure. Made sure all tunnel bits were aligned properly and the carving lines closed.
Step six: De-moulding the rough cast replica. All seam lines, air & casting channels are still attached.
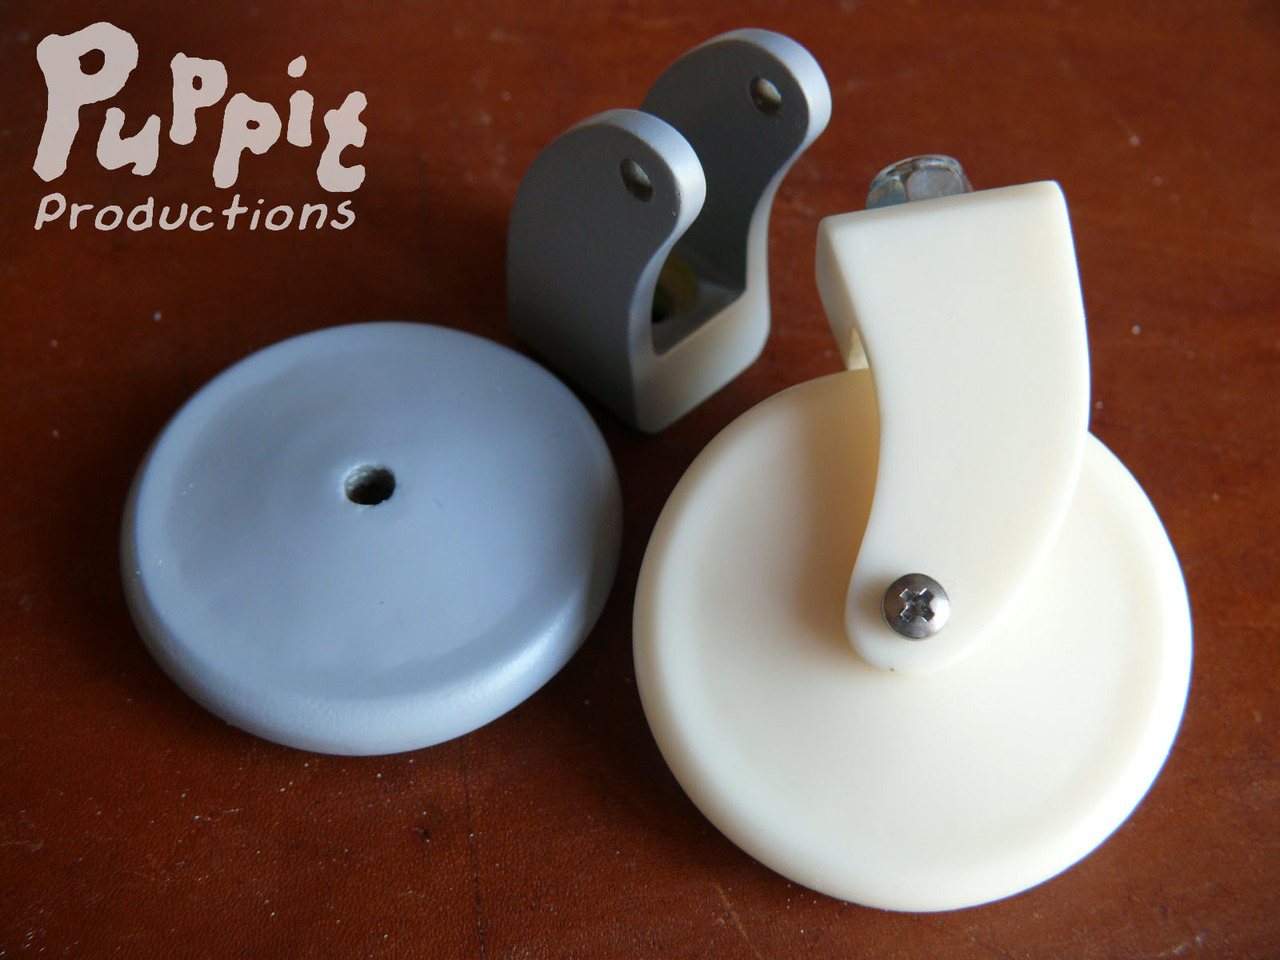
Step seven: Carved & sanded resin replica, next to the prototype! Doesn’t it look nice? :)
Resin Casting Moldmaking BJD Wheelchair Moulding Silicone Moulds Resin Doll Wheelchair Swivel Wheel Prototyping WIP Dragon Skin Silicone PU Resin Puppit Productions BJD How-To Tips & Tricks Tutorial Sorta Workshop Shots